This is a step-by-step guide on how to fix a leaking tap. Whether you’re experienced with DIY projects or just starting out, this article will show you how to repair that annoying drip.
By the end, you’ll feel confident tackling one of the top 5 DIY plumbing fixes every homeowner should know.
Knowing how to fix common plumbing problems like a leaking tap can save you money and keep your home in good condition. While a small leak may not seem like a big deal, it can lead to higher water bills and potential damage to your property over time.
In this guide, we’ll discuss:
- Understanding the causes of leaking taps
- Gathering the right tools for the job
- A step-by-step walkthrough for fixing your tap
- Tips for preventive maintenance
By learning and applying these concepts, you’ll be better prepared to handle minor plumbing issues before they turn into expensive repairs. For example, knowing some basic plumbing maintenance tips can help you prevent such problems in the future.
So let’s get started and explore the world of leaking tap repair!
Understanding the Causes of Leaking Taps
Knowing the root causes of leaking taps can save you a lot of frustration and water bills. Here are some common culprits behind those annoying drips:
- Worn-Out Washers: Over time, the rubber or silicone washers inside your faucet wear down from constant use. This wear and tear often results in leaks.
- Damaged O-Rings: The O-ring is another component that can deteriorate, especially in cartridge faucets. A damaged O-ring can cause water to seep around the handle.
Types of Faucets and Their Mechanisms
Identifying which type of faucet you have is crucial for correctly diagnosing and fixing leaks. Here’s a quick rundown:
Compression Faucets:
- How They Work: Feature separate hot and cold handles that control water flow by compressing a washer against a valve seat.
- Common Issues: Worn-out washers are the usual suspects here.
Cartridge Faucets:
- How They Work: Use a movable cartridge to regulate water flow. These can have single or double handles.
- Common Issues: Damaged cartridges or O-rings often cause leaks.
Ball Faucets:
- How They Work: Utilize a single handle that rotates over a ball mechanism to control water flow.
- Common Issues: Seals and springs inside the faucet may wear out, leading to leaks.
Disc Faucets:
- How They Work: Employ ceramic discs to regulate water flow. These are usually more durable but can still develop issues.
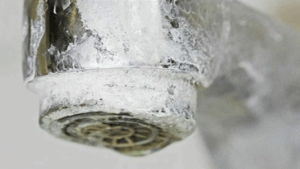
- Common Issues: Mineral deposits or worn-out seals are typical problems.
Understanding these causes helps you pinpoint the issue faster and choose the right fix method for your specific faucet type. However, not all plumbing problems are confined to taps alone; sometimes, the issues extend to other areas such as roofs.
In such cases, it’s essential to seek professional help. For instance, roof plumbing services can play a significant role in maintaining safety and efficiency for your property by addressing common roofing problems effectively.
Tools You Will Need for the Job
Before diving into fixing that pesky leak, gathering the right tools for plumbing repairs is crucial. Here’s a quick checklist:
- Flat-head screwdriver: Essential for prying off decorative caps or handles.
- Adjustable wrench: Perfect for loosening nuts and bolts of various sizes.
- Replacement parts: Always have spare O-rings and washers on hand to replace any damaged components you find.
- Needle-nose pliers: Handy for gripping small parts or reaching into tight spaces.
- Plumber’s grease: Helps ensure a smooth reassembly and prevents future leaks.
Having these tools ready not only makes the job smoother but also ensures that you’re fully prepared to tackle any unexpected issues that might crop up during the repair.
Being well-equipped means spending less time running back and forth to the hardware store and more time getting your tap back in working order.
Step-by-Step Guide to Fixing a Leaking Tap
Step 1: Turn Off the Water Supply
The first essential step in learning how to fix a leaking tap is to stop the water flow. Before diving into any repairs, you need to make sure that no water is running to the faucet. Here’s how you can do it:
- Locate the Water Supply Valve: Look under your sink; you should see valves connected to the pipes. These are usually located close to where the pipes come out of the wall.
- Tip: If you’re having trouble finding these valves, they might be behind a panel or under a nearby cabinet.
- Turn Off the Valve: Rotate the valve clockwise until it won’t turn anymore. This will shut off the water supply to your tap.
- Flat-head Screwdriver: Some valves may require a flat-head screwdriver for turning.
- Test the Faucet: Turn on the tap to ensure that no water is coming out. This step is crucial because any residual water can make your fixing process messy and challenging.
Why It’s Important
Stopping the water flow is more than just practical; it’s about safety and efficiency:
- Safety First: Working with an active water supply can lead to unexpected sprays or even minor flooding, which could cause slip hazards or water damage.
- Efficient Repair Work: A dry work area makes it easier to handle tools and replacement parts like O-rings and washers without slipping or losing grip.
Ensuring that no water flows during your repair process lets you focus on fixing the leaking tap without worrying about additional messes or complications. Once you’ve ensured the water supply is off, you’re ready to move on to disassembling your faucet.
If your hot water system is also experiencing issues, such as leaks or inconsistent temperature, it might be time to consider hot water plumbing repairs from experts like Franklin Plumbing who offer services in areas like Torquay, Geelong, Bellarine and Surf Coast.
Additionally, if you’re exploring more sustainable options for your hot water needs, you may want to check out the Franklin Plumbing Guide to Solar Hot Water.
And if you’re unsure whether your hot water system needs repairs, their guide on how to know if your hot water system needs repair could provide valuable insights.
Step 2: Disassemble the Faucet
Ready to get hands-on with fixing a leaky tap? Here’s where things get a bit more detailed. Follow these steps to disassemble your faucet:
Remove Decorative Handle Hardware
- First, locate any decorative covers on your faucet handle. These are usually small caps that cover screws.
- Use a flat-head screwdriver to gently pry off the decorative cap. Be careful not to scratch the finish.
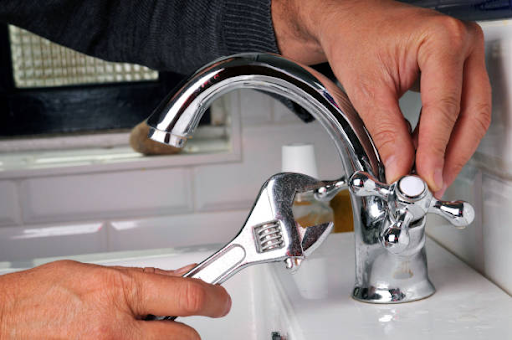
Unscrew the Packing Nut
- Once you’ve removed the decorative cap, you’ll see a screw or nut holding the handle in place.
- Use an adjustable wrench to unscrew the packing nut. Turn it counterclockwise until it comes off.
- Keep all parts organized so you can easily reassemble everything later.
Disassembling your faucet is an essential step for identifying what’s causing the leak. Whether you’re aiming to stop water flow or dive into one of the Top 5 DIY Plumbing Fixes Every Homeowner Should Know, this guide provides detailed instructions for each step involved in fixing a leaking tap.
Step 3: Inspect for Damage
When figuring out how to fix a leaking tap, start by identifying the usual suspects, which are often worn-out washers or damaged O-rings. These tiny components might seem insignificant, but they can be the main reason behind that persistent drip.
1. Check for Wear and Tear
Look closely at the washers and O-rings you’ve just exposed. If they appear cracked, brittle, or worn down, they’re likely in need of replacement.
2. Signs of Damage
Common indicators include visible cracks, flattened edges on washers, or a loose fit around the valve seat.
Pro Tip: Use a magnifying glass if necessary to get a better view of these small parts.
Knowing when to tackle repairs yourself and when to call in the pros is crucial. If you notice extensive damage beyond simple wear and tear—like corrosion on internal components—it’s wise to seek professional help. For such situations, Franklin Plumbing offers expert services ranging from routine fixes to emergency plumbing situations across Geelong, Torquay, Belmont, and more.
For everyday issues like replacing washers and O-rings though, you’re in good hands with this guide.
Step 4: Replace Damaged Parts
Ready to tackle the heart of the problem? Let’s dive into replacing those damaged washers and O-rings. Follow these steps:
1. Remove the old washer/O-ring:**
- Use a flat-head screwdriver to gently pry out the old washer or O-ring.
- Be cautious not to damage surrounding components.
2. Install the new washer/O-ring:**
- Make sure you have the correct size replacement part.
- Press the new washer or O-ring firmly into place.
3. Ensure a tight fit:**
- Double-check that the new parts are seated properly.
- A snug fit is critical for preventing future leaks.
Pro Tip: Applying a small amount of plumber’s grease to the new washer or O-ring can help create a better seal and make installation smoother.
By following these steps, you’ll be well on your way to fixing a leaking tap and ensuring it stays leak-free for the long haul. However, if you find yourself overwhelmed or if the leak persists, it might be time to call in an emergency plumber.
Remember, water leaks are a common cause of household flooding, so it’s crucial to address them promptly.
Also, if you’re planning for a larger scale renovation project in your home, consider seeking expert advice on planning for success in your home renovation project. This could help you avoid potential plumbing mishaps such as blocked drains which can lead to significant issues down the line.
Step 5: Reassemble the Faucet
Reassembling your faucet is straightforward when you reverse the steps you took to disassemble it. Here’s how to fix a leaking tap by putting everything back together:
- Insert New Components: Place the new O-rings and washers exactly where the old ones were. Ensure they fit snugly to prevent future leaks.
- Reattach the Packing Nut: Use your adjustable wrench to screw the packing nut back into place. Be careful not to overtighten, as this could damage the new components.
- Replace Decorative Handles: Slide the handle back onto the stem, securing it with screws if necessary.
- Install Handle Cap: Snap or screw the decorative cap back on top of the handle.
- Double-Check Everything: Give all parts a once-over to ensure they are tightly secured and properly aligned.
You’re nearly done! Next, we’ll cover how to stop a leaking tap by testing your repair work and making sure everything is functioning as it should.
By following these reassembly steps, you’re well on your way to mastering one of the Top 5 DIY Plumbing Fixes Every Homeowner Should Know!
Step 6: Test Your Repair Work
Time to see if all your hard work paid off! Here’s how to test your repair:
- Turn On the Water Supply: Carefully turn the water supply back on. Check under the sink for any immediate leaks.
- Check for Drips: Turn the tap on and off a couple of times. Look closely to see if any drips persist when the tap is turned off.
If you still notice any dripping, here’s what you can do:
- Recheck Your Work: Make sure all parts are tightly fitted and properly placed.
- Inspect for Additional Damage: Sometimes, other components may also be worn out.
- Seek Professional Help: If all else fails, reaching out to a professional plumber could save you from further headaches.
Remember, fixing a leaky tap isn’t just about stopping an annoying drip; it’s about maintaining plumbing safety and efficiency in your home.
Preventive Maintenance Tips for Taps & Other Plumbing Fixtures
Regular plumbing maintenance is essential to keep your home’s plumbing system in top condition, preventing issues before they become costly repairs. Here are some tips to help you stay on top of things:
1. Routine Inspections
Set a schedule to inspect your taps and other plumbing fixtures every few months. Look for signs of wear and tear such as moisture around the base of the faucet or unusual noises.
2. Address Minor Problems Promptly
If you notice a minor drip or leak, don’t wait for it to escalate. A small issue can quickly turn into a major headache if left unattended. In such cases, it’s wise to consult an emergency plumber who can provide immediate assistance.
3. Clean Aerators
Aerators can get clogged with mineral deposits over time. Unscrew and clean them regularly to maintain good water flow.
4. Check Water Pressure
High water pressure can strain your pipes and fixtures, leading to leaks. Use a water pressure gauge to ensure it stays within the recommended range (usually 40-60 PSI).
Proactive habits go a long way in maintaining your home’s plumbing system efficiently. Taking these simple steps can save you from unexpected emergencies and keep everything running smoothly!
However, if you encounter any serious plumbing issues, remember that professional plumbing maintenance services are just a call away.
FAQs about Leaking Taps
How do I know if my tap is leaking?
Spotting a leaky tap isn’t always as straightforward as seeing water dripping from the spout. Here are some telltale signs:
- Persistent Moisture: Notice any persistent moisture around the base of the tap? This could be a clear indication.
- Audible Dripping Sounds: Sometimes, even when the tap is turned off, you might hear that annoying drip-drip sound.
- Unusual Water Bills: An unexplained spike in your water bill could hint at a stealthy leak.
- Water Stains: Check for water stains or discoloration around or under the sink.
Top 5 DIY Plumbing Fixes Every Homeowner Should Know
Learning to handle minor plumbing fixes can save you time and money. Here are five essential skills:
- Fixing a Dripping Tap: This is a common issue, and knowing how to replace washers or O-rings can be invaluable.
- Unclogging Drains: Whether it’s the kitchen sink or bathroom drain, having a plunger and knowing how to use it effectively can prevent major blockages.
- Replacing Showerheads: A new showerhead can improve your shower experience and is easy to install with just an adjustable wrench.
- Toilet Repairs: From fixing a running toilet to unclogging it, these are handy skills to have.
- Clearing Gutters: Regularly cleaning out gutters prevents water damage and keeps your home’s foundation in good shape.
How do you stop a dripping tap?
Stopping that incessant drip is simpler than you might think:
- Turn Off the Water Supply: Make sure no water flows while you work on the tap.
- Disassemble the Faucet: Remove decorative parts and unscrew the packing nut using an adjustable wrench.
- Inspect for Damage: Look for worn-out washers or damaged O-rings.
- Replace Damaged Parts: Install new washers or O-rings where needed.
- Reassemble the Faucet: Put everything back together in reverse order of disassembly.
- Test Your Repair Work: Turn the water supply back on and check for leaks.
Understanding these basics helps tackle minor plumbing issues before they escalate into costly repairs. If you’re ever in doubt, don’t hesitate to consult with professional plumbers like Franklin Plumbing, who are always ready to assist with expert advice and services.
What should I do if my DIY fix doesn’t work?
Sometimes, despite your best efforts, a DIY plumbing fix just doesn’t cut it. That’s when it’s crucial to know when to call in the professionals. Tackling complex issues like extensive pipe bursts or blocked drains often requires specialized tools and expertise beyond typical homeowner capabilities.
Remember, just because things don’t go as planned on the first try doesn’t mean you should give up hope. It might just be time to seek help sooner rather than later! Whether you’re dealing with a stubborn leak or an emergency situation, professionals can ensure a quick and effective solution.
Can I use any type of washer for my faucet?
Using the correct replacement parts is crucial to ensure compatibility and optimal functionality for your specific model and brand. This approach guarantees long-lasting results without causing further complications down the line.
- Always consult the manufacturer’s guidelines or manuals if you’re unsure about what you need to purchase.
- Check out Top 5 DIY Plumbing Fixes Every Homeowner Should Know for more handy tips on maintaining your home’s plumbing system.
Using a mismatched washer can be like trying to fit a square peg into a round hole—it just won’t work right!
Conclusion
Taking control of your plumbing system can be incredibly empowering. By learning how to fix simple issues like a pesky leaking tap, you not only save money but also gain confidence in handling other minor repairs around your home.
The Top 5 DIY Plumbing Fixes Every Homeowner Should Know includes essential skills such as:
- Fixing a Leaking Tap: As we’ve covered, this is a straightforward task that every homeowner should master.
- Unclogging Drains: A plunger or drain snake can work wonders for minor blockages. However, for more severe issues, it’s important to understand what shouldn’t go down the drain and the consequences of neglect. Franklin Plumbing provides valuable insights on this topic.
- Replacing Showerheads: Upgrading or fixing a showerhead is easier than you might think.
- Fixing a Running Toilet: Often, the cause is a simple flapper that needs replacing.
- Sealing Leaky Pipes: With the right sealant or tape, small leaks can be quickly addressed.
Feel free to practice the techniques discussed in this article. The next time you encounter a plumbing challenge, tackle it confidently and fearlessly! Remember, knowledge and skill-building efforts like these are key to maintaining a well-functioning home.
If you’re considering a bathroom renovation, understanding the plumbing costs involved can be crucial. For any professional assistance needed in your plumbing projects, don’t hesitate to reach out to Franklin Plumbing, where expert plumbers are ready to assist you with repairs, installations, and maintenance.
Additionally, exploring the Franklin Plumbing blog can provide further expert insights, tips, and solutions on various plumbing issues.