Outdoor showers are becoming increasingly popular in Australia, providing a convenient and refreshing way to rinse off after a swim, work in the garden, or simply enjoy the great outdoors.
Whether you want to enhance your backyard’s functionality or add a touch of luxury, installing an outdoor shower can be a rewarding project. In this comprehensive guide by Franklin Plumbing, we will walk you through everything you need to know about installing an outdoor shower, from planning and design to installation and maintenance.
Why Install an Outdoor Shower?
Before diving into the details of installation, let’s explore the benefits of having an outdoor shower.
Convenience
Outdoor showers offer a convenient way to rinse off dirt, sand, or chlorine before entering your home, helping to keep your indoor spaces clean.
Enjoyment
There’s something inherently enjoyable about showering in the open air. It can provide a refreshing start to your day or a relaxing way to unwind after activities.
Property Value
An outdoor shower can add value to your property by enhancing its appeal and functionality, particularly if you live in a coastal area or have a pool.
Versatility
Outdoor showers can be designed to suit various needs, from simple rinse-off stations to elaborate spa-like setups with hot and cold water, seating, and privacy screens.
Planning Your Outdoor Shower
Proper planning is crucial to the success of your outdoor shower project. Consider the following factors before you begin.
Location
Choose a location that is convenient and has access to plumbing. Common locations include near a pool, garden, or back door. Ensure the area is level and has good drainage.
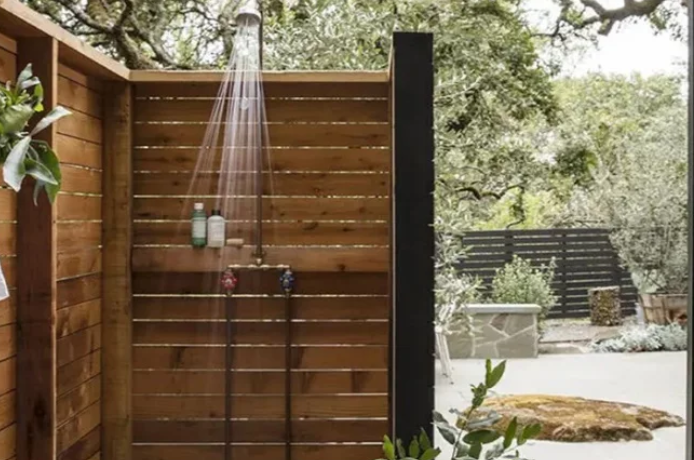
Design and Materials
Decide on the design and materials for your shower. Options range from simple wall-mounted units to freestanding structures with enclosures. Materials should be durable and weather-resistant, such as stainless steel, brass, or treated wood.
Plumbing and Water Supply
Determine whether you want a cold-water-only shower or a unit with both hot and cold water. For hot water, you will need to connect to your home’s hot water supply, which may require additional plumbing work.
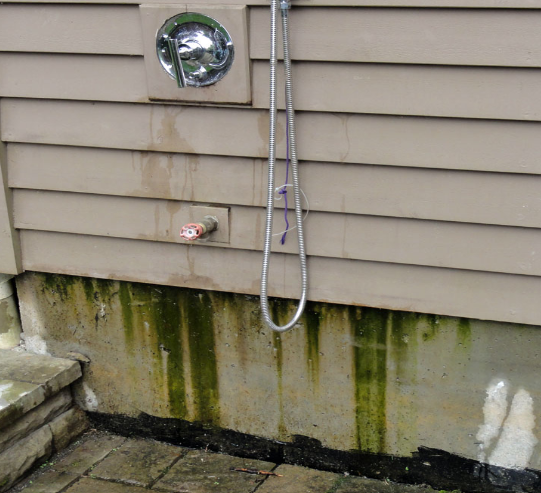
Drainage
Proper drainage is essential to prevent water from pooling and causing damage. Options include connecting to the existing drainage system, using a French drain, or creating a gravel bed for water to seep into the ground.
Privacy
Consider privacy when planning your outdoor shower. Depending on your location and preferences, you might want to install privacy screens, fencing, or landscaping elements to create a secluded shower area.
Installing Your Outdoor Shower
Once you have planned your outdoor shower, it’s time to move on to the installation process.
Tools and Materials Needed
- Shower fixture (wall-mounted or freestanding)
- Plumbing pipes and fittings
- Hose or PVC pipe
- Adjustable wrench
- Pipe cutter
- Screwdriver
- Level
- Drill and drill bits
- Concrete or gravel for drainage
- Privacy screens or fencing (optional)
Step-by-Step Installation Guide
1. Prepare the Site
Clear the area where you plan to install the shower. Ensure the ground is level and that you have access to the necessary plumbing connections.
2. Install the Drainage System
If you are using a gravel bed for drainage, dig a shallow pit and fill it with gravel. For more advanced drainage systems, follow the manufacturer’s instructions or consult a professional plumber.
3. Connect the Plumbing
Connect the shower fixture to the water supply using hoses or PVC pipes. For cold-water-only showers, connect to an outdoor faucet or hose bib. For hot and cold water, you will need to run pipes from your home’s plumbing system. Use a pipe cutter to trim pipes to the correct length and an adjustable wrench to secure fittings.
4. Mount the Shower Fixture
Follow the manufacturer’s instructions to mount the shower fixture to the wall or support structure. Use a level to ensure the fixture is straight, and secure it with screws or brackets as needed.
5. Test the Shower
Turn on the water supply and test the shower to check for leaks and proper water flow. Adjust the fixture as necessary to ensure optimal performance.
6. Add Privacy Features
If desired, install privacy screens, fencing, or landscaping elements to create a more secluded shower area.
Common Challenges and Solutions
1. Poor Water Pressure
If the water pressure is low, check for kinks in the hose or pipe. Ensure all connections are secure and free of leaks. You may need to install a pressure-boosting device if the issue persists.
2. Leaks
Leaks can occur at connections or fittings. Use plumber’s tape to seal threads and ensure all fittings are tightened securely. If leaks persist, consult a professional plumber.
3. Inadequate Drainage
If water pools around the shower area, adjust the drainage system to ensure proper flow. This may involve adding more gravel, adjusting the slope, or connecting to a more robust drainage system.
Maintaining Your Outdoor Shower
Regular maintenance will ensure your outdoor shower remains functional and attractive for years to come.
Cleaning
Clean the shower fixture regularly to prevent the buildup of dirt, soap scum, and mineral deposits. Use a mild cleaner and a soft brush to scrub surfaces.
Winterizing
If you live in an area with cold winters, it’s essential to winterize your outdoor shower to prevent damage. Drain all water from the pipes and shower fixture, and disconnect hoses. Consider covering the fixture with a weatherproof cover.
Inspecting for Leaks
Periodically inspect the plumbing connections for leaks. Tighten any loose fittings and replace worn or damaged components as needed.
Frequently Asked Questions (FAQs)
How long does it take to cremate a body?
The actual cremation process typically takes between 2 to 3 hours. However, including preparation and processing, the entire procedure can take 4 to 6 hours.
How long does a cremation take from start to finish?
From the beginning of the cremation process to the return of the ashes to the family, it usually takes about 4 to 6 hours.
How long does cremation take?
The time it takes to complete a cremation depends on various factors, but the actual cremation takes approximately 2 to 3 hours.
How long does it take to be cremated?
Including preparation, cremation, and processing, the entire cremation process can take between 4 to 6 hours.
Can I install an outdoor shower myself, or do I need a professional?
While it is possible to install an outdoor shower yourself if you have basic plumbing skills, it is often recommended to consult a professional plumber, especially if you need to connect to your home’s hot water supply or install a complex drainage system.
What materials are best for outdoor showers?
Durable, weather-resistant materials such as stainless steel, brass, and treated wood are ideal for outdoor showers. These materials can withstand exposure to the elements and provide long-lasting performance.
Do I need a permit to install an outdoor shower?
Permit requirements vary by location. Check with your local building authority to determine if a permit is needed for your outdoor shower installation.
How can I ensure privacy for my outdoor shower?
Privacy can be achieved by installing screens, fencing, or landscaping elements around the shower area. Choose materials and designs that complement your outdoor space and provide the desired level of seclusion.
How do I maintain my outdoor shower?
Regularly clean the shower fixture, inspect for leaks, and winterize the system if you live in a cold climate. Proper maintenance will ensure your outdoor shower remains functional and attractive.
Conclusion
Installing an outdoor shower can be a rewarding project that enhances the functionality and enjoyment of your outdoor space. With proper planning, installation, and maintenance, your outdoor shower can provide years of convenience and refreshment. Whether you prefer a simple rinse-off station or a luxurious spa-like setup, Franklin Plumbing is here to help you every step of the way.
For professional assistance with your outdoor shower installation or any other plumbing needs, contact Franklin Plumbing today.
- Phone: 0421 844 865
- Email: admin@franklinplumbing.com.au
Our team of experienced plumbers is dedicated to providing top-quality service and ensuring your satisfaction. We look forward to helping you create the perfect outdoor shower for your home.
